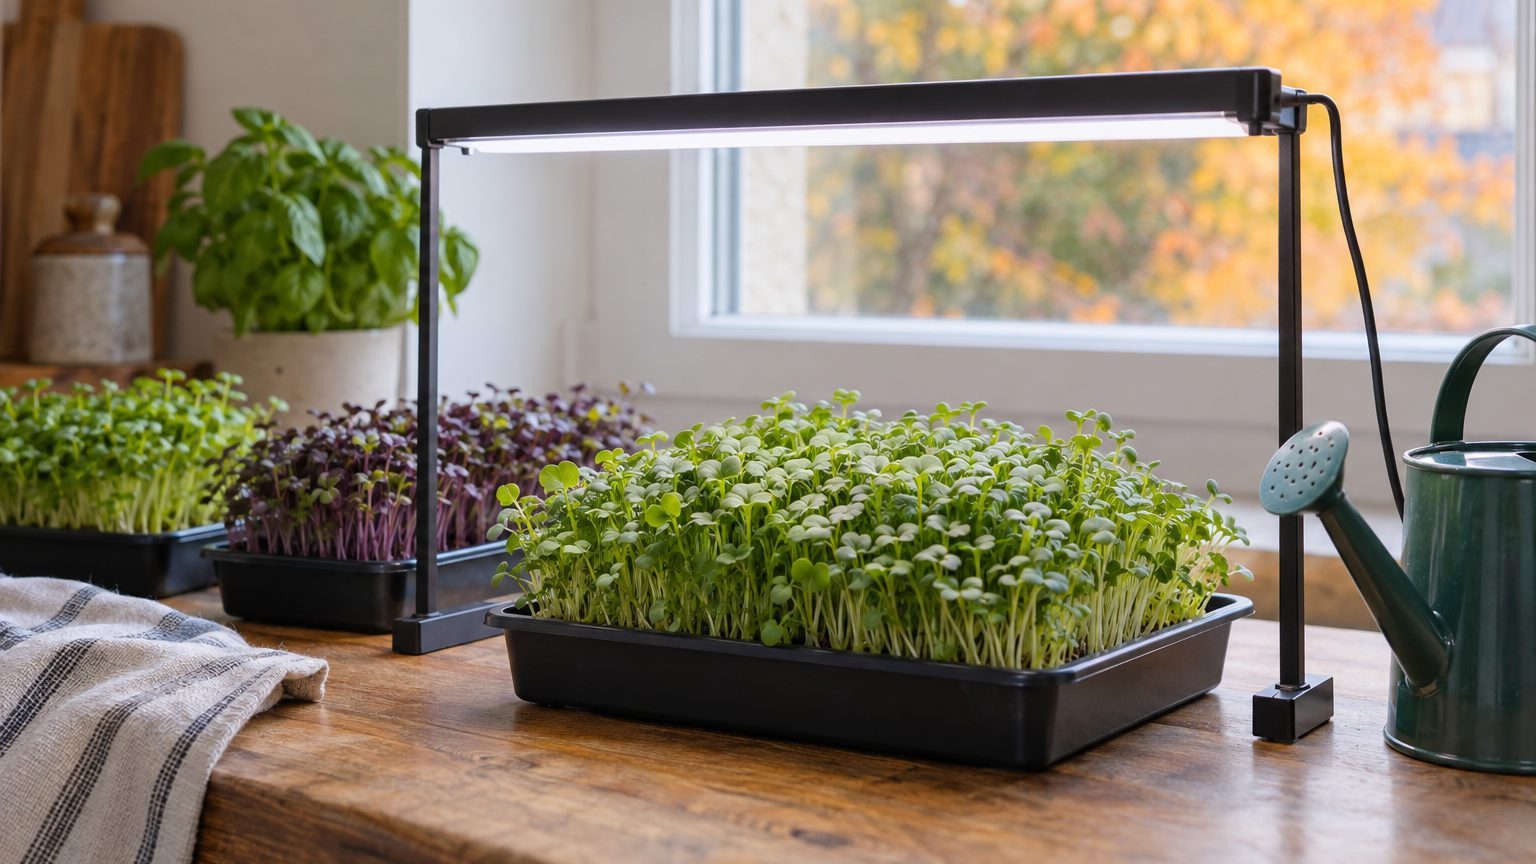
Microgreens can go from seed to harvest in about a week, sometimes two, right on a sunny windowsill or under a basic shop light. That speed is why they’re the most forgiving “indoor garden” many people will ever try, and also why they can turn into a fuzzy-mold mess if the setup is sloppy. This is the practical, start-to-finish method for how to grow microgreens indoors, with the small details that make the difference.
Microgreens are harvested very young, after the first true leaves begin to appear, usually at 1–3 inches tall. They’re different from sprouts: sprouts are grown in water and eaten root-and-all, while microgreens grow in a shallow medium and you cut the stems above the surface. That separation matters for cleanliness, airflow, and food safety.
Start simple: one tray, one crop, one light source.
Pick the right seeds and keep the expectations realistic
Almost any leafy vegetable can be grown as a microgreen, but some are friendlier for a first run. Radish, broccoli, kale, mustard, and peas germinate reliably and tolerate small mistakes, while basil, cilantro, and many alliums take longer and can be finicky about moisture. The fastest “confidence builders” are radish and mustard, which often look harvest-ready in the time it takes to forget you planted them.
Seed quality matters more here than in a big outdoor bed because you’re sowing densely, and every weak seed becomes wasted space. Look for seed intended for microgreens or at least untreated seed meant for eating, since you’re harvesting young tissue. If a packet warns that seed is treated, dyed, or for “ornamental use,” skip it.
Big seeds drink water like they own the place.
That’s why peas and sunflowers are often pre-soaked to speed germination and even out the stand. A typical soak is 6–12 hours in clean water, then drain well so they’re damp but not swimming. Tiny seeds like broccoli or arugula don’t need soaking, and soaking them can make them clump and sow unevenly.
Your indoor setup: trays, medium, light, and airflow
You don’t need a fancy rack, but you do need a system that manages moisture. Most home growers use shallow 10×20 trays, one with drainage holes nested inside a solid “bottom tray” to catch runoff. That simple two-tray approach lets you bottom-water, which keeps stems drier and reduces the chance of mold.
For the growing medium, you have a few workable options: a sterile seed-starting mix, coconut coir, or a light potting mix that drains well. Avoid heavy garden soil indoors, since it compacts, stays wet, and brings surprises you didn’t invite. Whatever you choose, aim for about 1 to 1.5 inches deep, lightly firmed so seeds sit on an even surface.
Clean trays are not optional.
Microgreens live fast, and microbes do too. Wash trays between batches with hot soapy water; for extra caution, a brief soak in a diluted bleach solution can reduce lingering spores, then rinse and dry. The U.S. Centers for Disease Control and Prevention keeps practical guidance on cleaning and sanitizing food-contact surfaces at home: https://www.cdc.gov/hygiene/cleaning/clean-surfaces.html.
Light is where indoor growers either spend money unnecessarily or sabotage themselves with “almost enough.” A bright south-facing window can work in summer, but year-round consistency is easier with an LED shop light or a basic grow light kept a few inches above the canopy and raised as the greens stretch. The goal is compact, sturdy growth; tall, pale microgreens are a lighting problem, not a “watering” problem.
Airflow doesn’t need to be dramatic, but stagnant air invites damping-off and surface fuzz. A small fan in the room, not blasting directly at the trays, helps stems dry after watering and keeps humidity from settling. If your home is naturally humid, that little movement can be the difference between crisp and creepy.
Sowing to germination: the small steps that prevent big failures
Fill the tray with moistened medium, level it, and gently press it flat with another tray or a board. Seeds germinate more evenly on a smooth, firm surface, and you’ll get a more uniform harvest height. Sprinkle seed densely, but don’t create piles, since clumps trap moisture and turn into weak spots.
After sowing, mist lightly just to seat the seed, then cover the tray to hold humidity for germination. Many people “stack” by placing an empty tray on top and adding a little weight, which encourages strong stems and even emergence. Two to four days later, when most seeds have popped and you see a little lift, remove the cover and get them under bright light.
Skip the temptation to drown the tray “so it won’t dry out.”
Overwatering is the fastest route to mold, algae, and thin stems that topple at harvest time. Bottom-water instead: pour water into the lower tray and let the medium wick it up for 10–20 minutes, then dump any extra. The surface should be moist, not shiny-wet.
During the first uncovered days, you’ll see “root hairs” on some crops, especially radish and broccoli, that look like white fuzz. Root hairs appear evenly and vanish after watering, while mold forms irregular patches and often smells off. If you’re unsure, increase airflow, reduce surface wetness, and keep the light close.
Daily care and harvest: timing, safety, and flavor
Once greens are under light, think in a simple rhythm: check moisture, check height, check smell. Most trays need water once a day in a dry home, less often in a cool or humid room, and the best indicator is the tray weight, not the look of the surface. If the tray feels light and the greens are perky, bottom-water; if it’s heavy and the stems look waterlogged, wait.
Temperature changes the whole schedule. Many microgreens grow well around typical indoor living temperatures, but cooler rooms slow growth and warmer rooms speed it up, sometimes too fast for good structure. If your greens race upward and fall over, bring the light closer and consider a slightly cooler spot with steady airflow.
Harvest is a cut, not a pull.
Use clean scissors or a sharp knife and cut just above the medium line, aiming to keep soil off the stems. Harvest when the first true leaves begin to show, since flavor is usually strongest then without turning fibrous, especially for brassicas like broccoli and kale. Pea shoots can be harvested a bit taller, but if they get too old indoors, they lean and tangle.
Wash or don’t wash? If your medium splashed up or you see any debris, rinse gently in cool water and dry thoroughly, because trapped moisture shortens fridge life. If the harvest is clean, many growers skip rinsing and instead focus on sanitary trays, careful bottom-watering, and clean cutting. Either way, store microgreens wrapped in a paper towel inside a container so condensation doesn’t pool.
If you want to connect this tiny indoor crop to your bigger backyard habits, treat microgreens like “practice reps” for spring seedlings: consistent light, controlled watering, and clean tools. The same instincts that keep a tomato seedling sturdy, light close and soil not soggy, are the instincts that keep a tray of broccoli microgreens from flopping. And if you’re already planning winter projects, pairing microgreens with an herb pot on the same shelf can make your kitchen feel like a miniature greenhouse rather than a place where plants go to limp.
One last nuance that surprises people: the “best” microgreen isn’t always the one that grows fastest, it’s the one you’ll actually cut and eat. Mild pea shoots can disappear into sandwiches for picky eaters, while spicy radish microgreens turn scrambled eggs into something you’d pay for at brunch, and that taste payoff is what makes the next tray get planted.