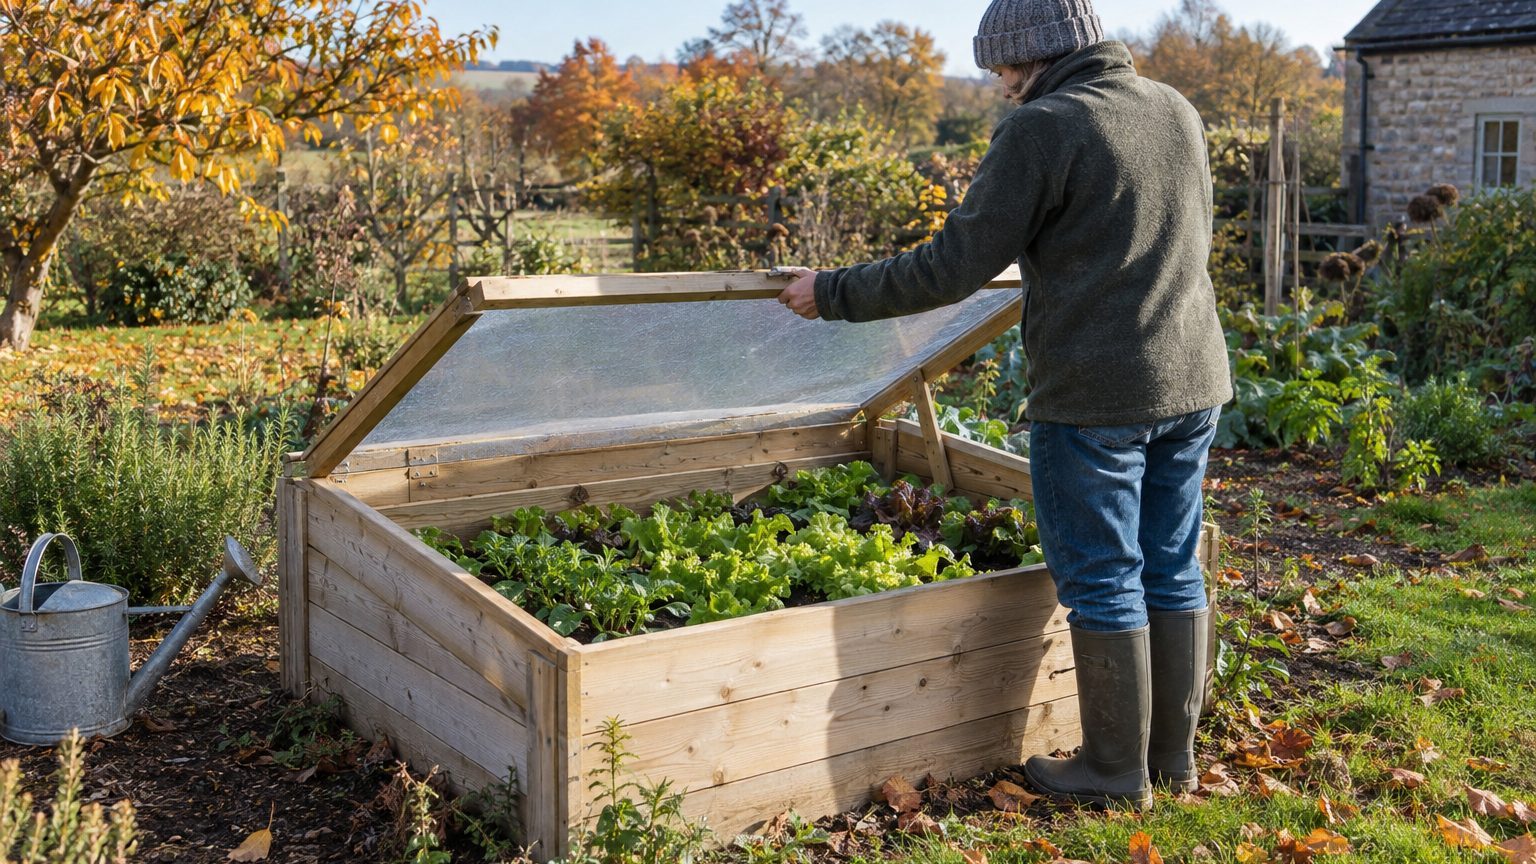
A cold frame is a bottomless box with a clear lid. It can extend the growing season by two to four weeks in both fall and spring, which is often the gap between the first hard frost and a salad you assumed was out of reach. The method for how to build a cold frame fits into one weekend, with a few boards, a window and a drill.
Build it Saturday, plant it Sunday.
- A cold frame extends the growing season by two to four weeks in both fall and spring.
- A salvaged framed window makes a practical lid, and its dimensions set the size of the whole box.
- The side boards are cut on a diagonal so the front sits lower than the back.
- The frame should face true south, which captures the most winter sun.
Gather the lid before you cut a single board
The glazing sets every other dimension, so find it first. The cheapest option is a discarded framed single-pane window, the kind that shows up at salvage yards, on curbs and in local classifieds. University of Vermont Extension pairs it with boards as long as the perimeter of the window and six or more inches wide. Scrounging usually brings the whole project in at very little cost.
Salvaged glass is not the only choice. Polycarbonate sheet and heavy clear plastic both work as lids, and the basic design stays the same either way: a frame and a transparent covering. Iowa State University Extension notes that most cold frames have frames built of wood, though cinderblocks, bricks, poured concrete, plastic lumber or straw bales all do the job. A ring of straw bales needs no saw at all, which makes it a decent first experiment.
Choose your wood with some care. Treated lumber lasts longer, but wood treated with creosote or similar chemicals should be avoided, since the box sits right over soil you plan to eat from. Untreated boards can be painted to slow rot, and white latex paint reflects light, while black on the inside walls absorbs heat and radiates it back. Pick one based on whether your problem is too little light or too little warmth.
Sand off old paint before reusing salvaged wood.
Cutting the slope and assembling the box
Start with the dimensions. Iowa State’s guidance is a frame about 12 inches high in front and 18 inches high in the back, and no more than 3 feet deep so you can reach the back row without stepping inside. For the width, follow the window. The back and front panels are simply rectangles as wide as the window, cut to your chosen back and front heights.
The side boards carry the geometry. Boards in 2×8, 2×10 or 2×12 sizes work for the box, and you cut the side boards on a diagonal so the south-facing front sits lower than the back. Mark the line with a straightedge from the back height to the front height, then cut it with a circular saw or jigsaw. Drill pilot holes before driving screws so the ends don’t split, and join the four pieces into a slanted, bottomless rectangle.
Next come the hinges. Mount them on the window along the back of the frame, so the lid lifts up and away from you. A notched stick or a scrap of wood makes a serviceable prop for venting, and you can improvise one in two minutes.
That slope also sheds rain and snow instead of pooling it.
Orientation: where the box earns its keep
Face the lid south. In winter the sun tracks low across the southern sky, so a frame facing south, southwest or southeast gets the greatest exposure to solar heat. Tuck it against the south side of a building or fence to ward off north winds. Iowa State adds that the spot should have good, well-drained soil that doesn’t flood or collect water.
Precision pays off here. One field-tested guide puts the loss at roughly 5 to 8 percent of available solar radiation for a frame 10 degrees off south, and 15 to 20 percent if the long side faces east-west instead. It also recommends verifying true south with a compass app, adjusting for magnetic declination. Resist the urge to point the frame toward the patio because it looks better there.
Placement is more flexible than people assume. You can set a frame directly over a garden bed and lift it away when temperatures warm, or park one near the house to reach vegetables earlier in the season. The second option wins in snowy regions, where trudging to the back corner of the yard in January gets old fast.
Venting, planting and the one mistake to avoid
Overheating kills more cold frame crops than frost does.
A closed, glazed box on a sunny 50-degree afternoon can climb far past what lettuce tolerates. Put a thermometer inside and open the window to control the temperature, or offset or remove it entirely to let cooler air in. Make it a habit before you leave for work on any day with sun in the forecast.
Cool-season crops are the natural tenants. Spring greens like lettuce are the classic first planting, and because cold frames need sunlight to build heat, they aren’t the best tool for plants that prefer partial shade. Spinach, radishes and other hardy greens fit the same profile. Save the tomatoes for a warmer calendar.
Hard winters call for extra measures. Where winters are very cold, a cold frame can be insulated, and a blanket thrown over the lid on the coldest nights adds another layer of protection without any rebuilding. Expect the two-to-four-week extension to stretch a little further in mild climates and shrink in the harshest ones.
Sources : thegardensmallholder.com | farmerflints.com