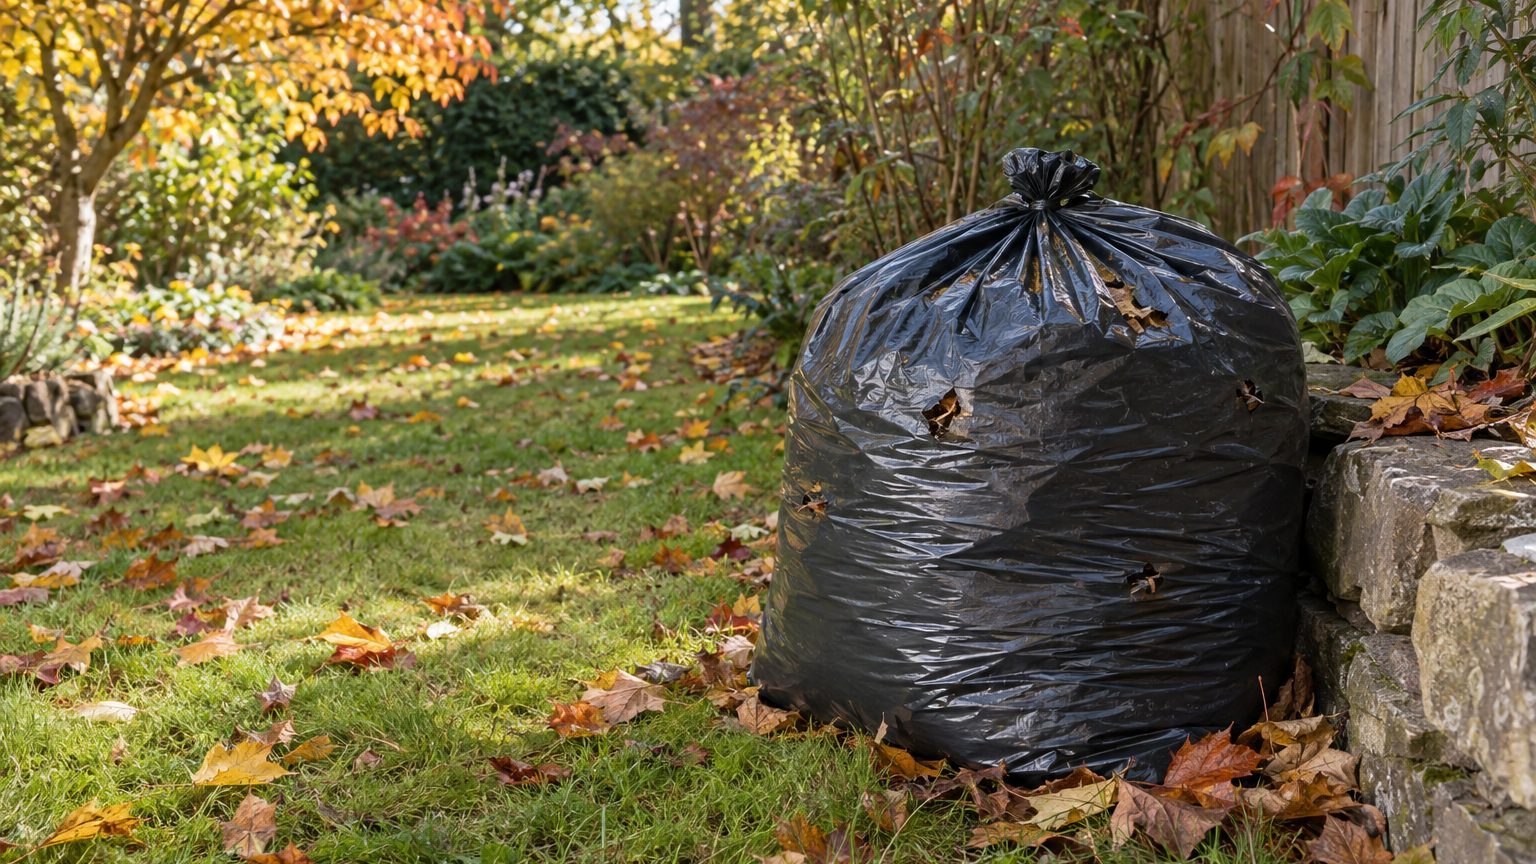
Fill a heavy black trash bag about three-quarters full of leaves. Dampen them until they feel like a wrung-out sponge, then tie the bag shut and poke holes in it for airflow. Park it in a shady corner and check the moisture every month or two. In roughly six months to a year, the leaves turn into dark, crumbly leaf mold. That’s the whole method. The details below keep the bag from turning into a slimy, smelly mess.
How to compost leaves in black bags
Start with the right bag. Nebraska Extension recommends 30 to 40 gallon black plastic bags at 3 mil thickness. Contractor-grade bags fit that description. The cheap kitchen kind can split when you drag one across the lawn, and the bags have to survive a year or more of sitting outside.
Shred the leaves first if you can. Running a rotary mower over a dry pile, or feeding them through a chipper-shredder, breaks them into small pieces that rot much faster than whole leaves. A shredded load also packs tighter, so you fit more into each bag. Whole leaves still work. They just take longer.
Moisture matters a great deal. Autumn leaves are dry, and the fungi that break them down need water to work. Fill the bag, add water until the leaves are damp but not soaked, and mix by shaking. A dry bag does nothing for months. A soaked bag goes anaerobic, and anaerobic leaves smell like a swamp.
Leave about a quarter of the bag empty. That headspace lets you shake the contents and gives the leaves room to settle as they shrink. Tie the top shut, then puncture the sides and bottom with a garden fork, a screwdriver or a knife. Nebraska Extension suggests 12 to 15 holes per bag. North Carolina’s extension service suggests cutting a few holes or slits. Either way, the bag has to breathe.
Nebraska Extension also describes a no-holes variation. You leave the bag intact but open it every other day to check moisture and let oxygen in, and if the contents are too wet you leave it open for a day or two. Few people will keep that up, and I wouldn’t bother. Holes are easier.
Where to put the bags
Shade is better than sun. A bag of black plastic in direct summer light can dry out fast, and leaf mold is a cool, slow, fungal process rather than a hot one. The north side of a shed, the back of a garage or a spot under a deck works well. Stack the bags out of sight and give them a prod now and then.
One tip from Nebraska Extension: bags break down faster if you keep them in a heated garage over winter. If you have the floor space, that’s a cheap speed-up. If not, an outdoor corner is fine. Cold only slows the process down.
How to make leaf mold for the garden
The bag method fits small yards. If you only have a few trees, a handful of bags is easier to manage than a wire bin. It also keeps leaves from blowing around and gives you a way to separate batches. Maple leaves in one bag and oak in another is a reasonable setup if you want to keep track of what you’re getting. If you have a lot of leaves and room for a bin, the general how to make leaf mold guide covers the pile and cage methods.
Plain leaves are the standard recipe. Leaf mold is only leaves and water. That makes it different from compost, which mixes in green material such as kitchen scraps or grass clippings. Nebraska Extension offers an option that borrows from the compost side: add about half a cup of high-nitrogen fertilizer or two shovels of manure to each bag. That feeds the microbes and can shorten the wait. It’s optional, and the result will be closer to compost than to true leaf mold. The difference matters for what you use it for, which the leaf mold vs compost comparison explains.
Pick your leaves carefully. Avoid black walnut leaves. They contain juglone, a chemical that is toxic to some plants. Fully composted walnut leaves are usually safe, but juglone may persist in leaf mold, which doesn’t age as long. If you have walnut trees, keep their leaves out of your bags.
Don’t throw diseased leaves in either. Leaf mold doesn’t heat up the way a hot compost pile does, so it won’t reliably kill pathogens or pests. Leaves with heavy fungal spotting belong in the municipal yard-waste stream, not in your soil amendment.
Once it’s ready, leaf mold is a soil conditioner rather than a fertilizer. Penn State Extension notes that it isn’t high in nutrients, yet it improves soil structure and increases water retention. North Carolina’s extension service says leaf mold increases the water retention of soils. That helps in sandy beds that drain like a colander. You’ll still need compost or another fertilizer to feed your plants.
Use it as mulch around perennials and shrubs, mix it into vegetable beds, or blend it into potting mixes. Sift out the coarse leftovers first if you want something fine enough for seed starting. Toss the unfinished bits into your next bag, where they’ll act as a starter.
How long does leaf mold take in a bag?
Expect six months to a year. Nebraska Extension says material in the bags needs 6 to 12 months to decompose. North Carolina’s extension service gives the same range. Some sources report about six months for shredded leaves kept damp. A pile of whole leaves left alone can take up to two years or more, so the bag is usually the faster route. It holds moisture in, which is why bags tend to outpace open cages. For a deeper look at timelines and what speeds them up, see how long does leaf mold take.
Bag a load in November and you may have something usable by late spring, though a full year is the safer bet. Shredded leaves in a bag that gets checked regularly sit at the fast end. Whole oak leaves in a neglected bag sit at the slow end. Thick, leathery leaves such as oak are slower than maple.
Between filling and harvesting, the maintenance is light. Check the bags every month or two, or every four to eight weeks, and add water if the leaves feel dry. Shake them every few weeks to mix the contents if you want to move things along. If you skip a check, nothing bad happens. A dry bag simply pauses until you add water.
Two problems come up. A bag that smells sour or feels slimy is too wet or too airtight. Poke more holes and mix in dry material such as shredded paper or cardboard. A bag that stays dry in the middle needs a thorough soak, not a quick splash. Pour water in, shake, and give it a day to spread.
The bag is done when you can’t pick out whole leaves anymore. Nebraska Extension describes the finished material as looking like good black soil. Open the bag and look for dark brown or black, crumbly, with an earthy smell. If you still see intact leaves, tie it back up and wait. Opening early doesn’t hurt anything. It’s still a useful mulch, just a coarser one.
Expect shrinkage. Leaves lose most of their volume as they rot, so a bag that starts full may end up about half full or less. One gardener estimates that three bags of shredded leaves produce about one bucket of finished leaf mold. That’s a personal estimate, not a rule, but it gives a realistic sense of the payoff. If you want a bucketful, bag a lot.
While the bags cook, they can do a second job. Nebraska Extension notes that you can place filled bags around plants that need protection from winter wind, such as roses or broadleaf evergreens. The bags act as a windbreak for those plants. By spring they’ve done two jobs before you ever untie them.
Sources : rhs.org.uk