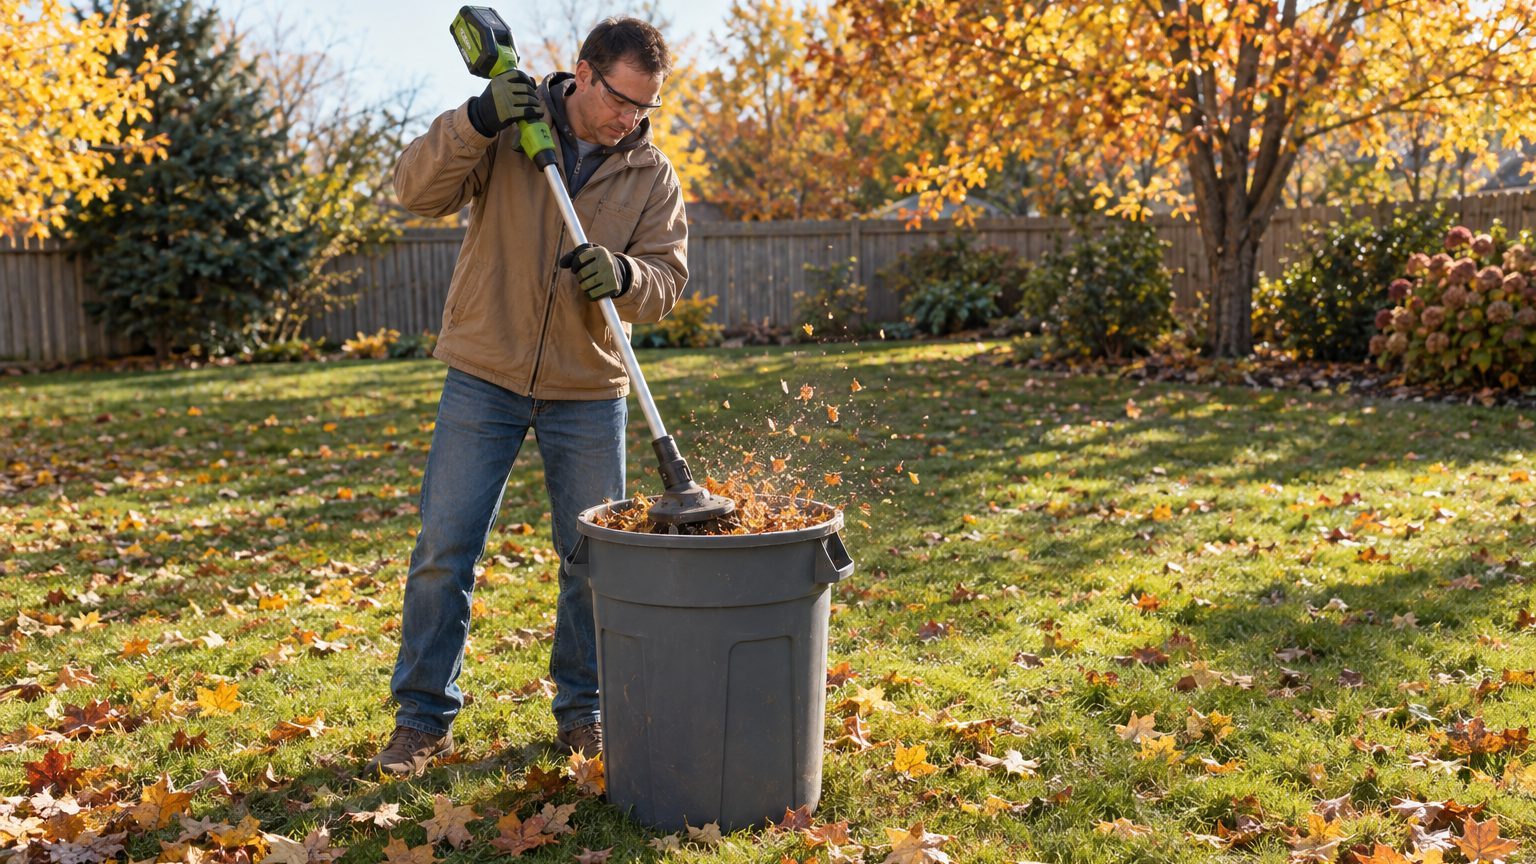
A string trimmer and a trash can will shred leaves in roughly 30 to 60 seconds per batch. Fill a sturdy plastic can about halfway with dry leaves, lower the spinning trimmer head into it, and work it up and down like a blender. It needs nothing but tools many people already own. If you’d rather skip power tools, you can drive over a pile, run a blower in vacuum mode, or crush leaves by hand on a tarp. Each method works. They differ in speed, noise and how much your back complains afterward.
How to shred leaves without a mower
Penn State Extension calls a lawn mower
the only tool needed
for shredding leaves, and it’s right that a mower is the easiest route. But plenty of yards have no mower in the shed, or a mower that sputters when it meets a thick layer of oak leaves. Three alternatives come before any hand work.
The first is the blower with a vacuum setting. A blower/vac
sucks up leaves and shreds them into a bag
, so you collect and shrink the pile in a single pass. Shredded leaves also
take up much less space than whole ones
, which means fewer bags to drag to the curb or the compost bin. If you already own one, this is probably your best match for a mid-sized yard.
The second is less glamorous. Pile leaves on the driveway and
drive over them to break them up
. A few slow passes will crack and crumble dry leaves. The result is coarser and dustier than a mower’s output, and you’ll sweep leaf bits off concrete afterward, but it costs nothing and takes minutes. Check the pavement first. Sticks and acorns can fling out from under a tire.
The third option is to skip shredding altogether. Whole leaves go into compost fine. They
take noticeably longer to break down
than shredded ones, and that’s the main penalty. For anyone facing six oaks and one free Saturday, that trade is often worth making.
One rule applies to every method here: wait for dry leaves. Wet ones
clump together and will likely tangle in a string trimmer
or clog a vacuum impeller. If rain has soaked the yard, spread the leaves on a tarp in the sun for an afternoon first.
Mulching leaves with a string trimmer
The trash-can trick looks like a gimmick and performs like a real tool. The setup is simple. Use
a heavy-duty plastic trash can with thick walls
, because the line will occasionally hit the sides. Gather your leaves with a rake and tarp or a blower, then
fill the can about half full
. That headroom matters. Overfill it and the head has no room to move.
Next, prep the trimmer. One guide suggests
trimming the line to about 4 inches
, since longer line strains the motor and can damage the bin. Keep the guard on. Wear gloves and eye protection (leaf dust and flying fragments both find eyes quickly), and add hearing protection if you’re using a gas model. Electric trimmers are lighter to hold vertically, which counts for something after the fifth batch.
Now the actual shredding. Stand the can upright, lower the head in, and
pulse in short bursts
rather than holding the trigger down. Move the head up and down so it reaches the bottom layer. Most batches need
about 30 to 60 seconds
of shredding, depending on dryness and depth. Now and then, switch the trimmer off and wait for the head to stop completely, then check the texture and stir the unshredded bottom leaves into the path of the line. Aim for confetti, not powder.
Then pour the contents into a wheelbarrow or straight onto a bed and refill. A side benefit is that the leaves
are already in a trash can for easy transportation
, so the container you shredded in is also your hauler. Slightly damp leaves produce less dust, according to one practical guide, but don’t take that as permission to shred wet ones. Damp means the leaves feel cool and pliable, not clumped.
The limits are worth knowing. A trimmer in a can suits small and medium jobs. If you have a quarter acre of maples, you could spend a whole weekend feeding batches into a bucket, and your trimmer line will wear down faster than you expect. Waxy or leathery leaves such as magnolia also
resist chopping
and may need a second round. For those, mix them into a batch of softer leaves or just compost them whole.
How to shred leaves by hand
No electricity, no gas, no noise. Hand shredding is slower, but it works well on dry leaves and gives you exercise you’d otherwise pay a gym for.
The stomp-and-crush method is the easiest to start with. Spread dry leaves on a tarp, fold the tarp around them into a bundle, and
jump or stomp on top of the bundle
to crush them. A variation is to layer leaves in a trash can and stomp them down, wearing sturdy shoes. Stomping compacts as much as it shreds, so open the bundle every few minutes and fluff the leaves before the next round.
Then there’s the “tarp twirl.” Pile leaves on a tarp, gather the edges, and
spin it vigorously
so the leaves grind against each other. It sounds silly. It also works best with a small, dry load, and it’s a good job for two people, one on each side.
For more control, use a tool with an edge. Dry leaves
are particularly easy to shred with a spade or rake
, which means you can pile them in a shallow tub or wheelbarrow and chop downward with the flat edge of a spade. Garden shears do the same job on smaller quantities. For a handful, you can simply
crumble dry leaves in a tub
with gloved hands. Anyone with a few potted plants or a single raised bed will find this plenty.
Another trick is brute weight. A lawn roller or heavy board, pushed or dragged over piled leaves, will crush them without any motor. It won’t produce a fine mulch, but it flattens a volume that would otherwise overflow your bin.
Where the shredded leaves go
The reason to bother is that shredded leaves behave better than whole ones. They
decay much more quickly
and
tend to mat down less
, so water gets through to the soil. A thick wet blanket of whole maple leaves, by contrast, can seal a bed shut. For more on the payoff, see this guide on using leaves as mulch, and for a closer look at the material itself, read about shredded leaves as mulch.
Penn State Extension recommends
a 2 to 4-inch layer around trees and shrubs or on perennial beds
. Water the layer after you spread it to help it stay put. Pull it back a few inches from stems and trunks, since mulch piled against bark invites rot and pests. The mulch will
moderate soil temperatures, retain moisture and keep down weeds
, which is a lot of work for something that was headed for the curb.
On turf, go lighter. The same extension service says
a layer up to about one-half inch
helps the lawn. A three-year study reported in a Midwestern extension column found that
a 2-inch cover of shredded leaves is reasonable over winter
, but
a 4-inch depth is highly likely to cause winter damage
. That study’s final analysis wasn’t complete when it was reported, so treat it as a ceiling and not a target. If your trimmer-shredded leaves would bury the grass, put them in beds or the compost bin instead. A longer walkthrough of the process lives in how to shred leaves for mulch.
If shredding feels like too much trouble, there is one more route. Piling whole leaves in a corner to make leaf mold takes no equipment at all. It’s slow, often a year or two, but it asks nothing of you except patience.
Sources : extension.psu.edu | pubs.ext.vt.edu | colonialnewburgh.com